How To Use SSH Remote On Mac Without Extra Fluff
Ever wondered how to connect to remote servers using SSH on your Mac without overcomplicating things? Well, you’re not alone. Tons of people struggle with setting up SSH connections, especially if they’re new to coding or networking. But guess what? It’s way easier than you think. In this guide, we’ll break it down step by-step so you can master SSH in no time.
SSH, or Secure Shell, is like a secret tunnel that lets you access remote computers securely. Whether you’re managing a website, working with IoT devices, or just tinkering around, SSH is your go-to tool. But let’s face it—there’s a ton of jargon out there that makes it seem harder than it needs to be.
This article is here to simplify everything for you. We’ll cover everything from the basics of SSH to troubleshooting tips, all tailored for Mac users. So grab a cup of coffee (or tea, if that’s your vibe), and let’s dive right in!
Read also:Holiday Mathis Monthly Horoscope Your Cosmic Companion For Every Month
Table of Contents:
- What is SSH?
- Why Use SSH?
- Setting Up SSH on Mac
- Generating an SSH Key
- Connecting to a Remote Server
- Using the SSH Config File
- Common SSH Commands
- Troubleshooting SSH Issues
- Security Tips for SSH
- Conclusion
What is SSH?
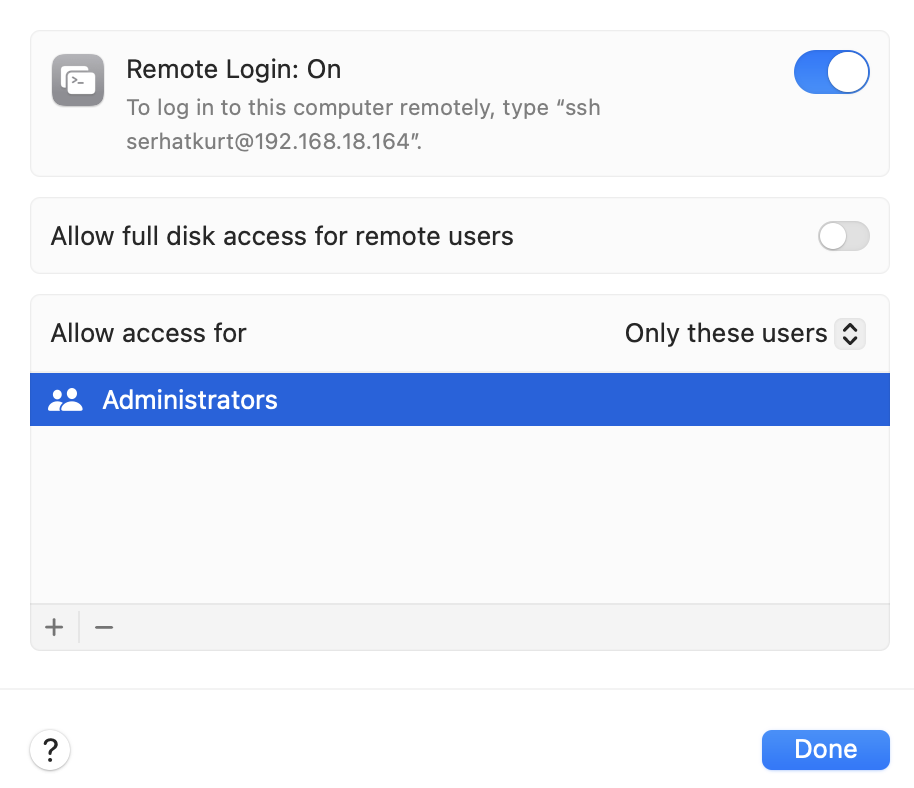
SSH, or Secure Shell, is basically a protocol that lets you remotely control and manage another computer over a network. It’s like having a remote control for your server or IoT device, but with an extra layer of security. The "secure" part comes from encryption, which keeps your data safe during transmission.
Imagine this: You’ve got a Raspberry Pi set up at home, and you want to access it from work. Or maybe you’re managing a website hosted on a remote server. SSH allows you to do all of this without needing to physically be there. Plus, it’s free and built right into macOS, so you don’t need to install any extra software.
Here’s the deal: SSH isn’t just for tech wizards. Even if you’re new to the whole concept, you’ll find it pretty straightforward once you get the hang of it.
Why Use SSH?
So, why should you bother with SSH when there are other ways to access remote systems? Here are a few reasons:
- Security: SSH encrypts your data, making it much harder for hackers to intercept your communications.
- Efficiency: Once you’ve set it up, SSH lets you perform tasks quickly and easily, saving you tons of time.
- Flexibility: You can use SSH to transfer files, run commands, and even set up secure tunnels for other applications.
- Compatibility: SSH works across different platforms, so whether you’re on a Mac, Linux, or even Windows, you can still use it.
In short, SSH is a powerful tool that every tech-savvy person should know how to use. And the best part? It’s already built into your Mac, so you don’t need to spend hours installing complicated software.
Read also:Wasmo Muslim Telegram The Ultimate Guide To Navigating This Trending Platform
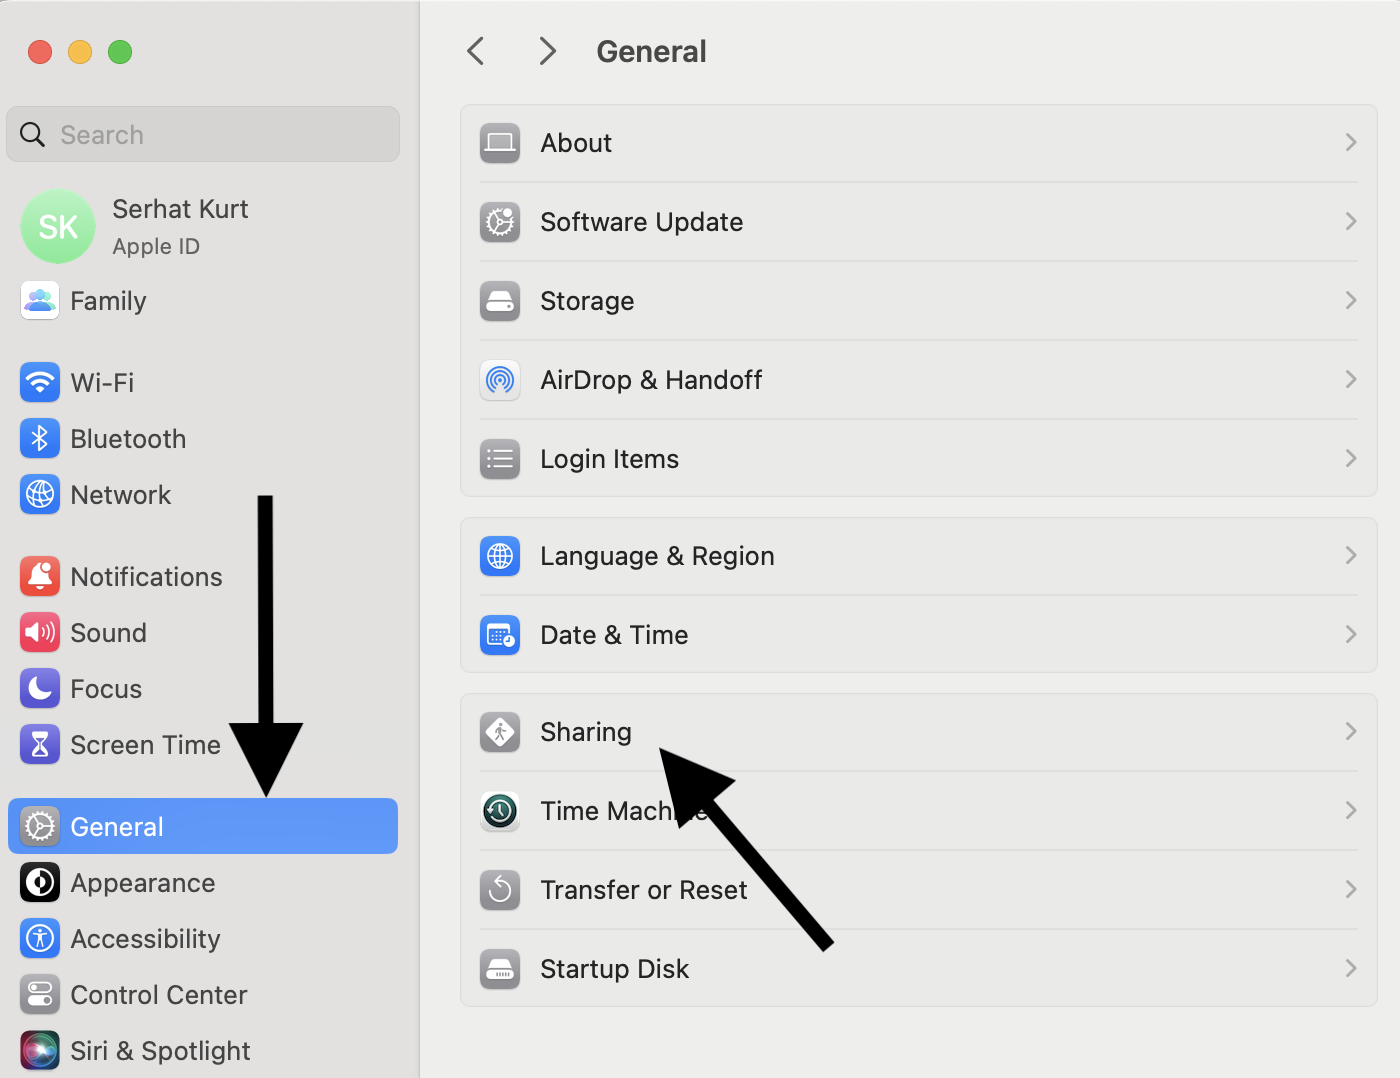
Setting Up SSH on Mac
Alright, let’s talk about how to set up SSH on your Mac. The good news is, macOS comes with SSH pre-installed, so you’re already halfway there. Here’s what you need to do:
Step 1: Open Terminal
First things first, you’ll need to open Terminal. You can find it by searching for "Terminal" in Spotlight (just press Command + Space and type it in). Once you’ve got Terminal open, you’re ready to roll.
Step 2: Check SSH Installation
To make sure SSH is installed (spoiler alert: it is), type the following command into Terminal:
ssh -V
This will display the version of SSH installed on your Mac. If you see something like "OpenSSH_8.x.x", you’re good to go.
Generating an SSH Key
Before you can connect to a remote server, you’ll need to generate an SSH key. Think of this as your digital ID card. Here’s how you do it:
Open Terminal and type the following command:
ssh-keygen -t rsa -b 4096 -C "your_email@example.com"
Here’s what each part means:
- -t rsa: Specifies the type of key (RSA).
- -b 4096: Sets the key size to 4096 bits for extra security.
- -C "your_email@example.com": Adds a label to your key, usually your email address.
Once you hit Enter, you’ll be prompted to enter a file location for your key. You can just press Enter again to save it in the default location (~/.ssh/id_rsa).
Next, you’ll be asked to set a passphrase. This is optional but highly recommended. It adds an extra layer of security in case someone gets access to your private key.
Connecting to a Remote Server
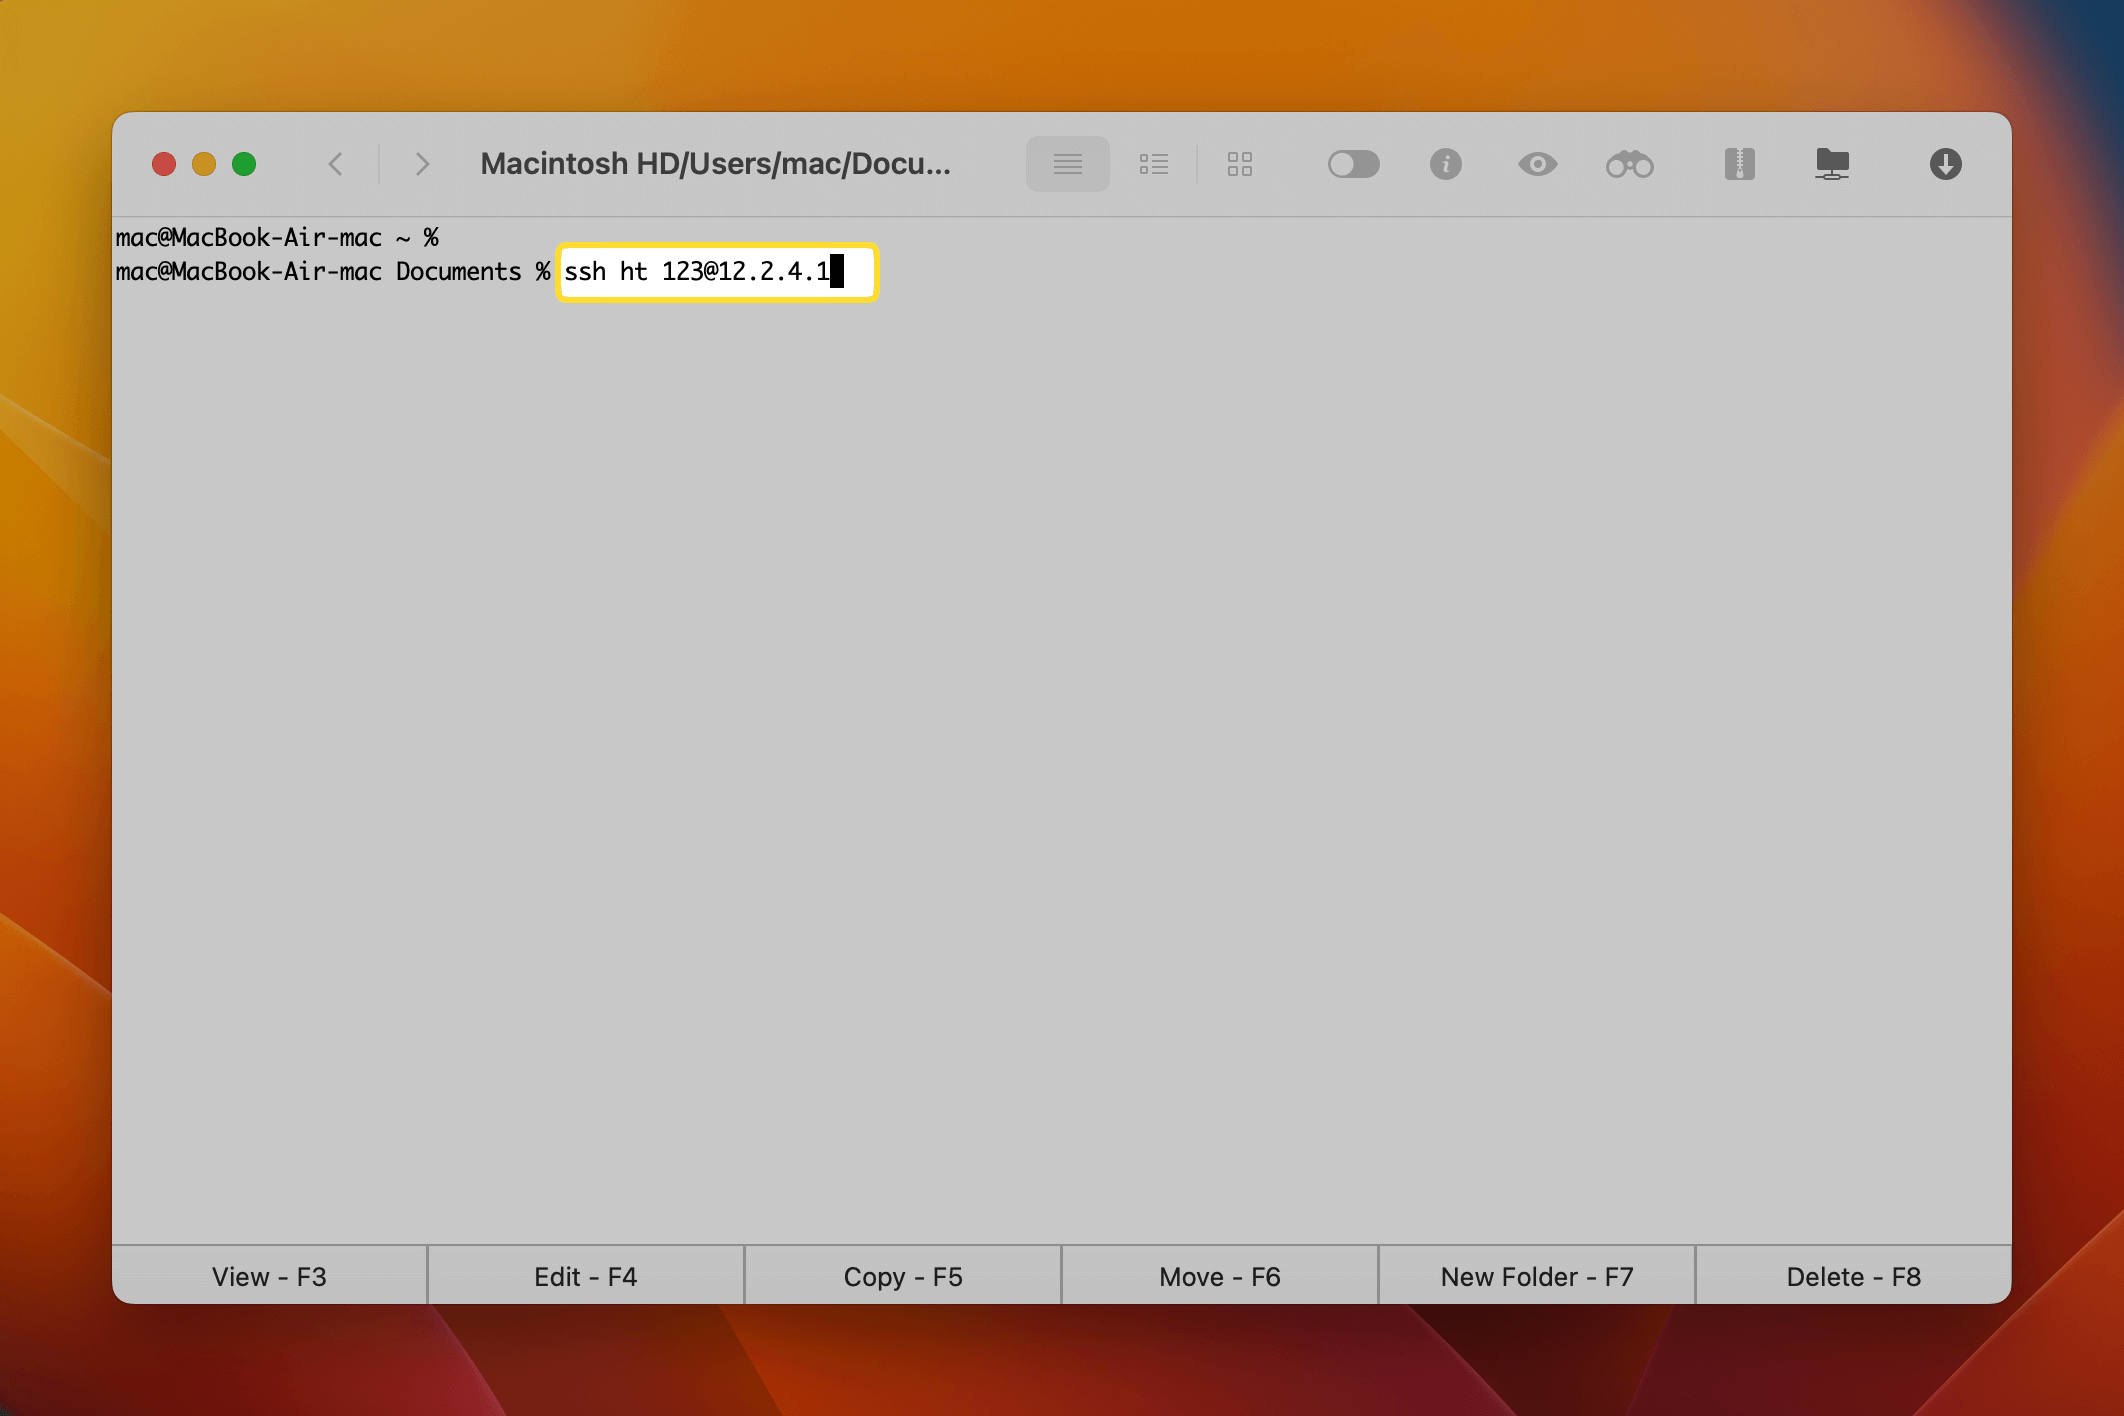
Now that you’ve got your SSH key ready, it’s time to connect to a remote server. Here’s how:
Open Terminal and type the following command:
ssh username@server_ip_address
Replace "username" with the username you use on the remote server, and "server_ip_address" with the actual IP address of the server.
When you hit Enter, you might see a warning about the server’s authenticity. Just type "yes" and hit Enter again. You’ll then be prompted to enter your password (if you haven’t set up key-based authentication).
Voilà! You’re now connected to your remote server.
Using the SSH Config File
Let’s face it: typing out the same SSH commands over and over can get tedious. That’s where the SSH config file comes in. This file lets you save connection details so you can connect with just one simple command.
Here’s how to set it up:
Open Terminal and type:
nano ~/.ssh/config
This will open the config file in the Nano text editor. Add the following lines:
Host myserver HostName server_ip_address User your_username IdentityFile ~/.ssh/id_rsa
Save the file by pressing Control + O, then Exit with Control + X.
Now, you can connect to your server with just this command:
ssh myserver
Common SSH Commands
Once you’re connected to a remote server, there are a bunch of useful SSH commands you can use. Here are some of the most common ones:
- ls: Lists files and directories.
- cd: Changes the current directory.
- scp: Copies files between your local machine and the remote server.
- sudo: Runs commands with administrative privileges.
- exit: Logs you out of the remote server.
These commands might seem basic, but they’re incredibly powerful when you’re working with remote systems.
Troubleshooting SSH Issues
Even the best-laid plans can go awry. If you’re having trouble with SSH, here are a few common issues and how to fix them:
- Connection Refused: Make sure the server is running and the SSH service is enabled.
- Permission Denied: Double-check your username, password, and key permissions.
- Timeout Errors: Ensure your network connection is stable and the server’s firewall isn’t blocking your IP.
If none of these work, don’t hesitate to reach out to your server administrator for help.
Security Tips for SSH
SSH is secure, but there are still a few things you can do to make it even more robust:
- Use Strong Passwords: Avoid using common words or easily guessable phrases.
- Enable Key-Based Authentication: This eliminates the need for passwords altogether.
- Disable Root Login: Restrict access to the root account to prevent unauthorized access.
- Change the Default Port: Move SSH from port 22 to something less obvious to deter attackers.
These tips will help keep your SSH connections safe and secure.
Conclusion
And there you have it—a comprehensive guide to using SSH on your Mac without all the unnecessary complications. Whether you’re managing a remote server or tinkering with IoT devices, SSH is an invaluable tool that every tech enthusiast should know how to use.
Remember, practice makes perfect. The more you use SSH, the more comfortable you’ll become with it. So don’t be afraid to experiment and try new things.
Now it’s your turn! Got any questions or tips of your own? Drop a comment below and let’s chat. And if you found this guide helpful, don’t forget to share it with your friends. Happy SSH-ing! 😊
Article Recommendations